The Chevron Wall. The quitessential statement of all things prep. Or trendy. Or really just about anything. Depending on the color scheme, the chevron pattern lends itself to become just about aything. Obviously, I chose colors and a larger, blockier pattern to be a more understated prep.
The Chevron Wall can seem daunting at first. Where to even begin is the first challenge. For the room I was painting, this was particularly difficult. Way back when, my parents mixed sand into the a strange color of sage/olive green to create an “interesting” texture. The end result was that it actually just looked like green sandpaper with a rough grit. So the first obstacle was to figure out how in the world to remove this texture.
Thank goodness it was as easy as painting a thick primer over the walls

Although this picture is sort of dark (sorry it was like 2am by the time I had finished painting) – you can still tell that the wall is covered pretty thick. We used about 2gallons of primer to cover the entire walls. Running your hand over the walls with the primer on them, you could tell that there was still some left over “grit” but I figured that the next two (or three, or four) coats of the colored paint would to well to finish covering the sandy texture.
And I was right
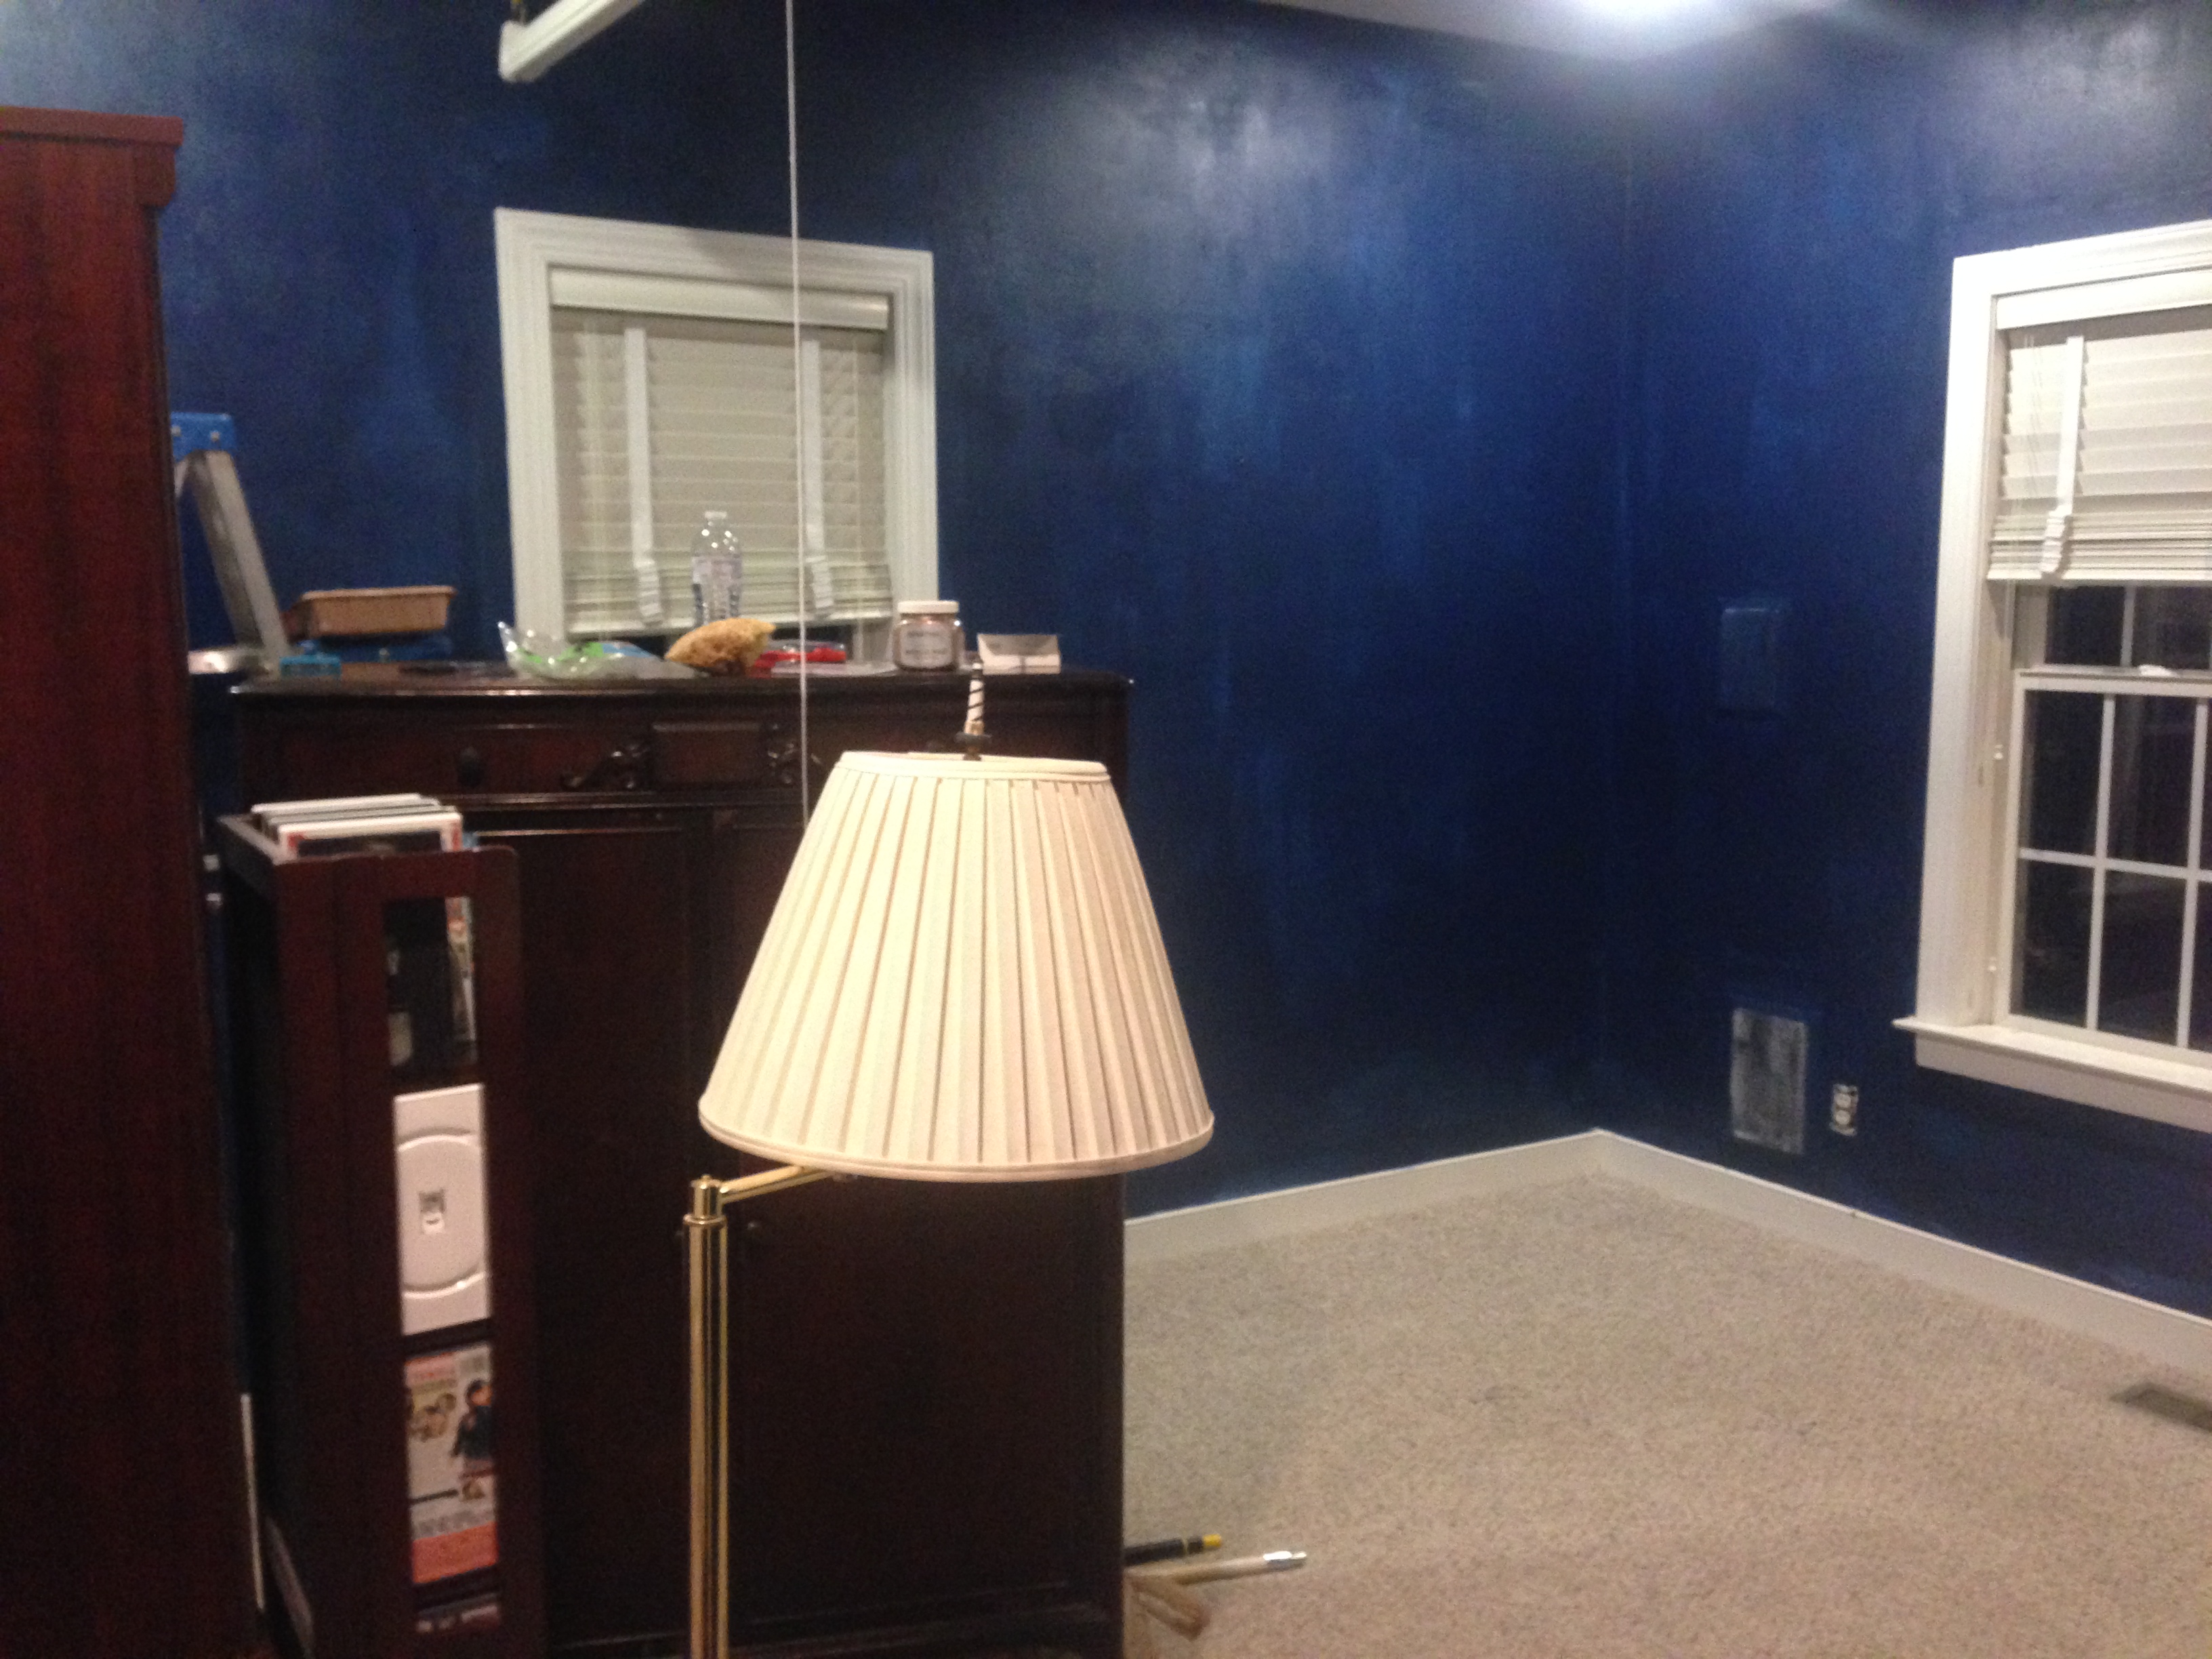
Although there’s definitely still a solif coat and a half to go here, you can already see how much smoother the walls were looking
Then came the worst part. The actual chevron-ing of the front wall.
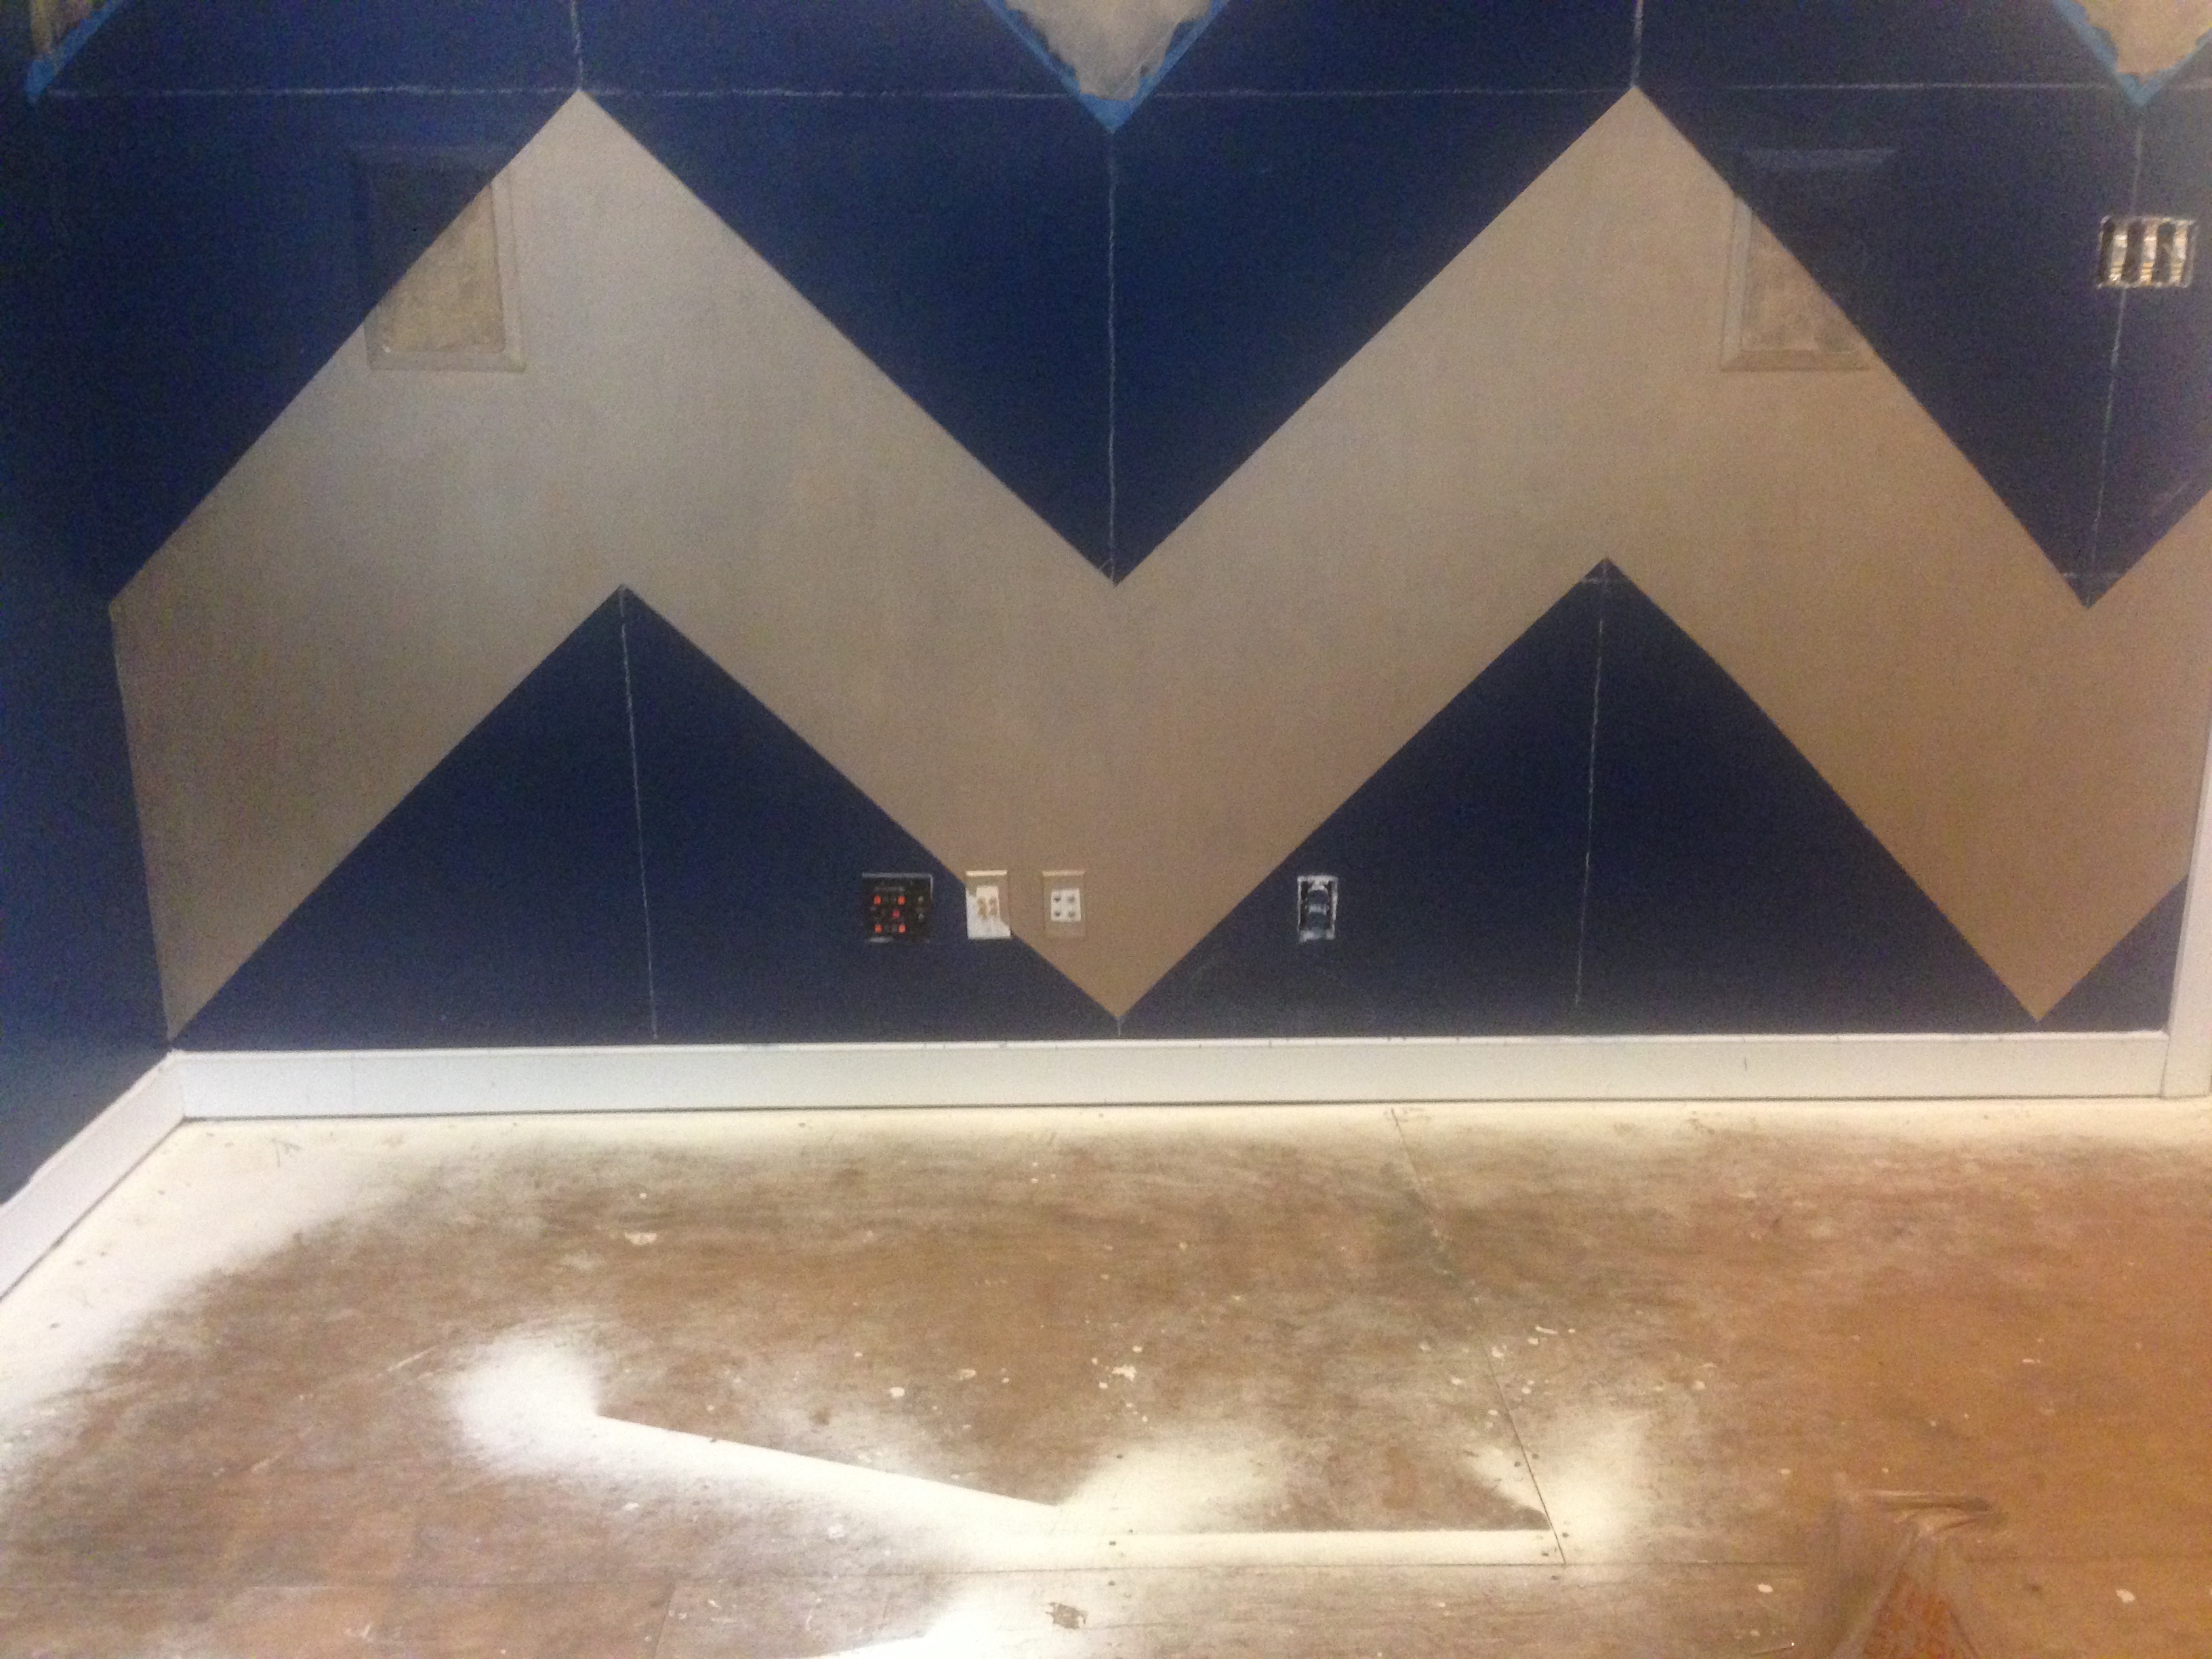
I measured the wall all the way across. Based on the length, I determined that the measurement from point to point would have to be approximately 1.5 feet. So, using chalk (and since I hadn’t exactly thought that part through while in Home Depot, I ended up using sidewalk chalk that had been in our garage for years, and it worked super well) I made a gridwork all the way across the wall. This was definitely one of the more time consuming and frustrating parts of the project. It took my sister and myself about 2 hours to chalk out the whole wall, not counting the probably hour and a half it took to figure out the actual measurements (but that’s really only because I suck at math, not because it should actually take that long)
Next came the taping

So simple and easy with the grid marks. Of course the door was a bit of a pain in the butt, but it too was conquered.
The next step that tons of people overlook is to seal the edges of the tape with the base color. I know it seems stupid asnd redundant, especially if you splurged on the “special super locking tape” that so many of the brands sell. Here’s a hint. Don’t buy them, you still have to seal the edges of the tape with the base color to make sure that none of the accent color leaks under the tape. Because it will, don’t be fooled.
I knew I wanted to find a nice gold color to paint the chevron, but it was so hard to find. Seriously, there are like a million and none gold paint colors all at the same time. Don’t ask me how this makes sense. For some reason it just does. So, after lots of searching, I stumbled across the Martha Stewart paints and found an antique gold color that absolutley fit the style I was going for.
Yep. That’s a keeper. I also decided to paint the electrical outlets, even if they weren’t going to be seen too much, I knew it would be something that would bother me.

Annnnnd, yes I painted over the speakers. They had already received the sand green treatment, so I figured this regular paint wouldn’t do too much damage. And the speakers work! Although they’re still not hooked into the tv.. Just the gamecube…
Anyways. The Chevron Wall was conquered. (A fact I am still a little bit shocked by). But it definitely goes to show that pretty much any one can chevron. I mean seriously. I did it.
